Gateway Solo 3450 hard drive swap
Not that it's any different from most compact laptops out there (excepting ibooks, which are a bit of a pain, but easy to find other info on the net) but here's a super quick series of pictures illustrating taking apart a solo 3450 enough to swap out the hard drive in it:
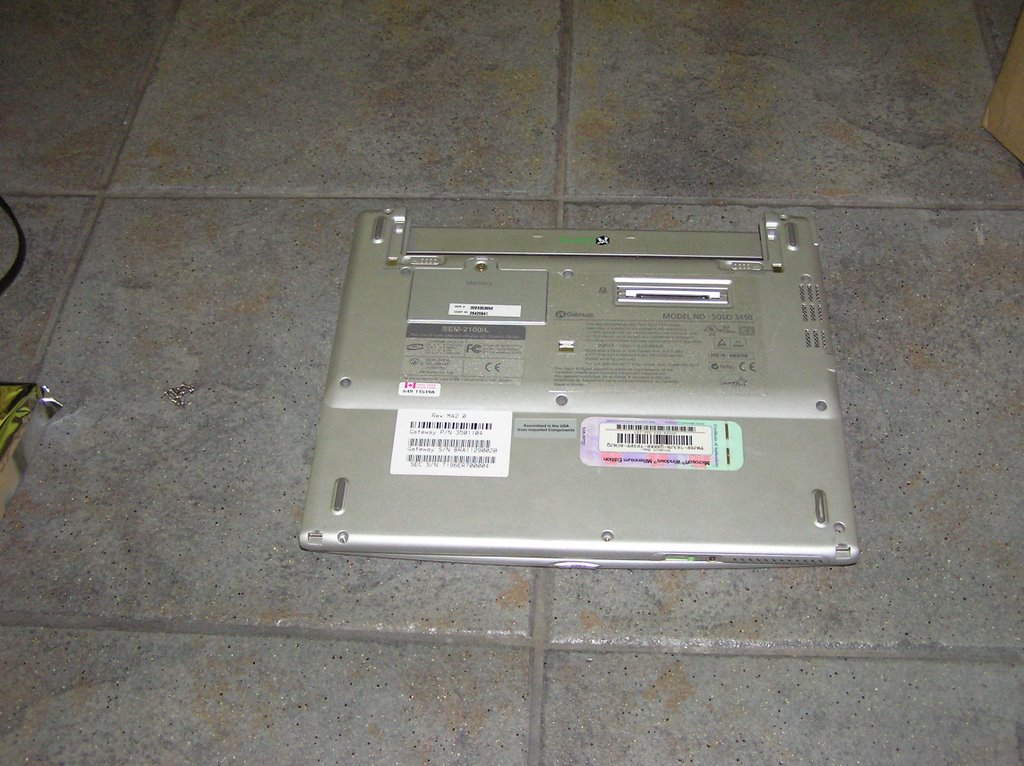
First, pull out the screws on the bottom. Think there were 9 of them, pull the ones that are under the touchpad panel and keyboard, leaving only the ones under the screen hinges in.
Take out the keyboard:
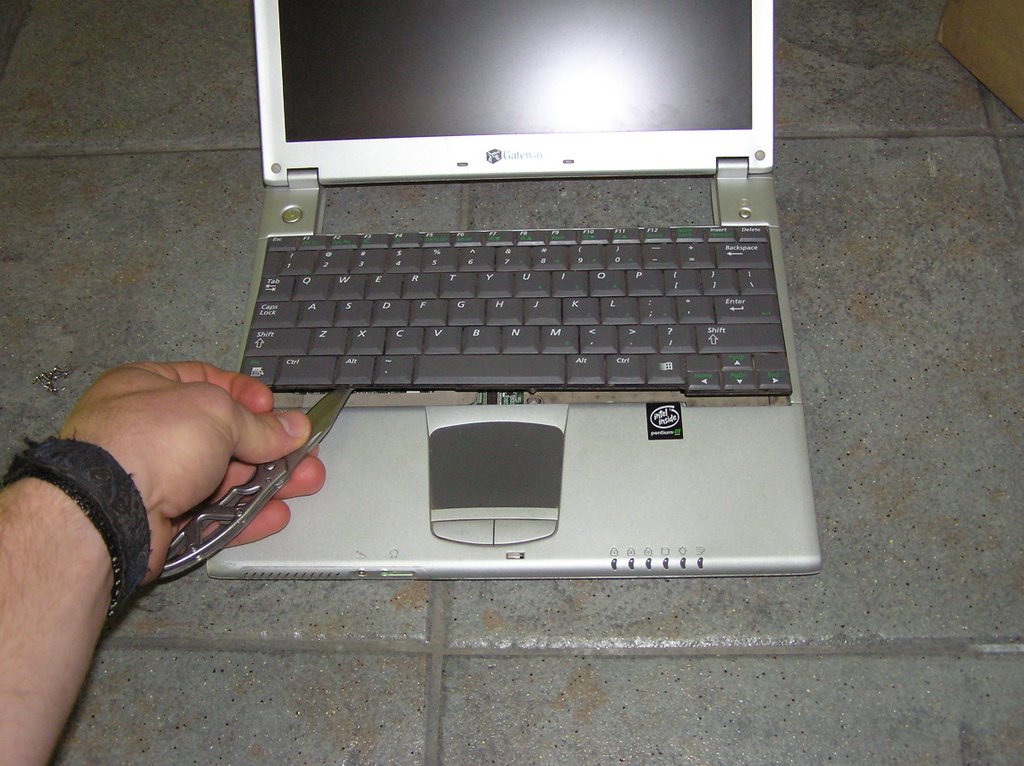
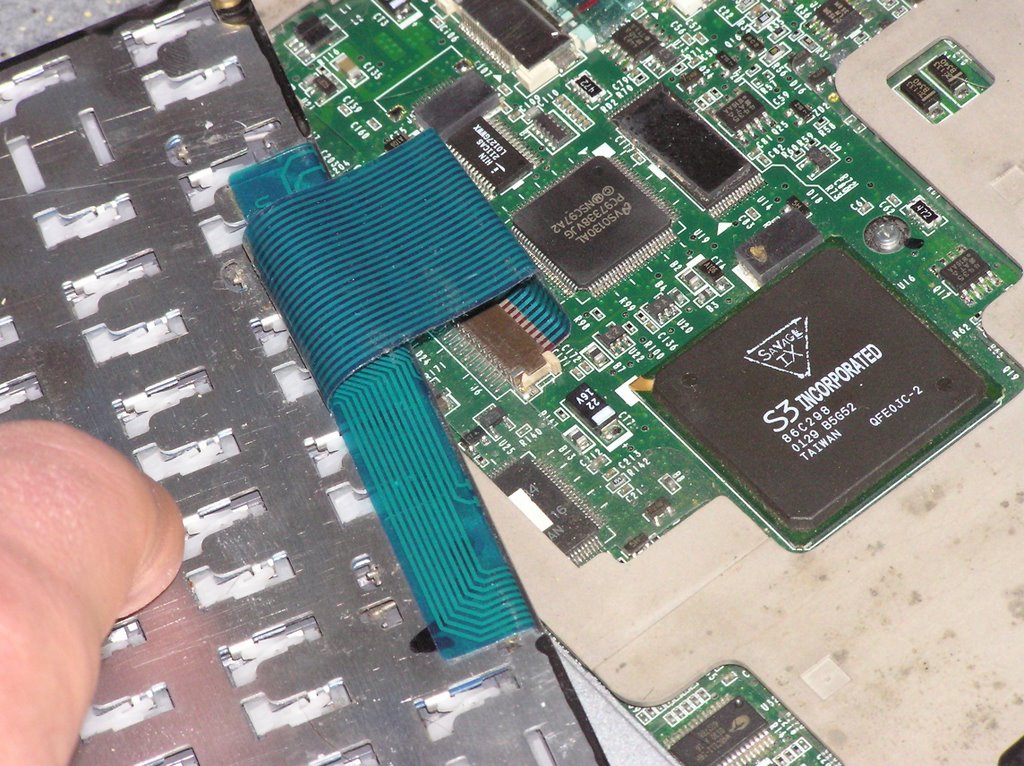
To unhook the keyboard, there's just the one usual flat cable to deal with. To release it, slide the little white tabs on the connector in the direction that the cable exits the connector. You can see the little tabs in this picture:
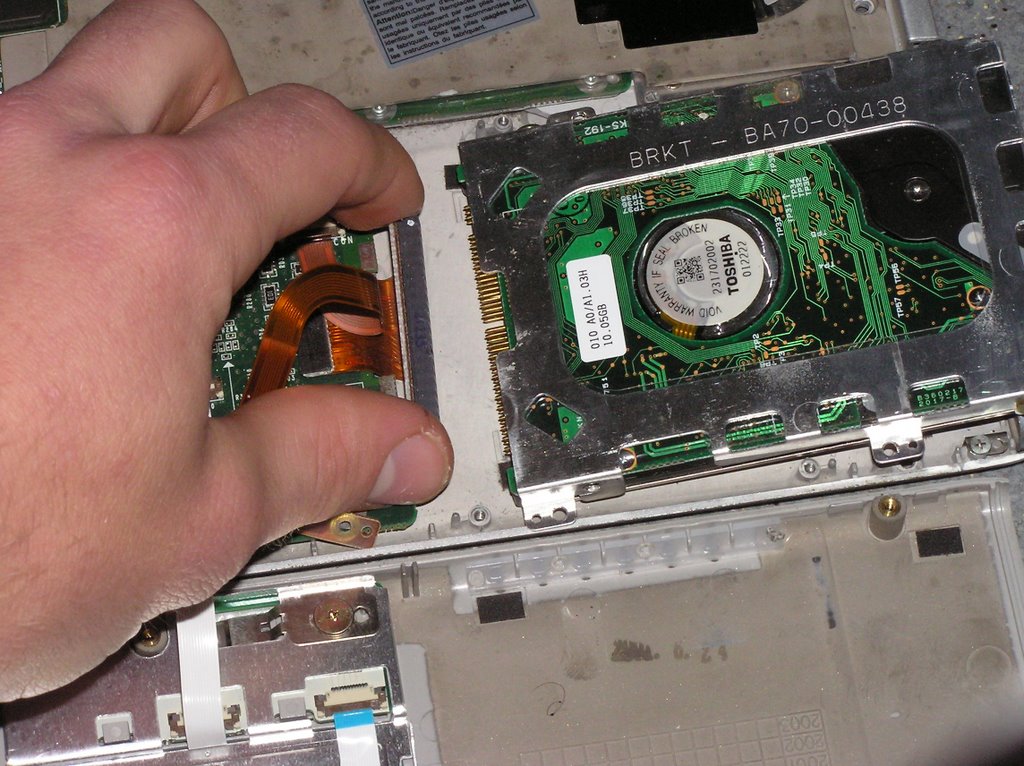
Don't bother unhooking the front case with the touchpad, just flip it out of the way to reveal the hard drive and it's carrier:
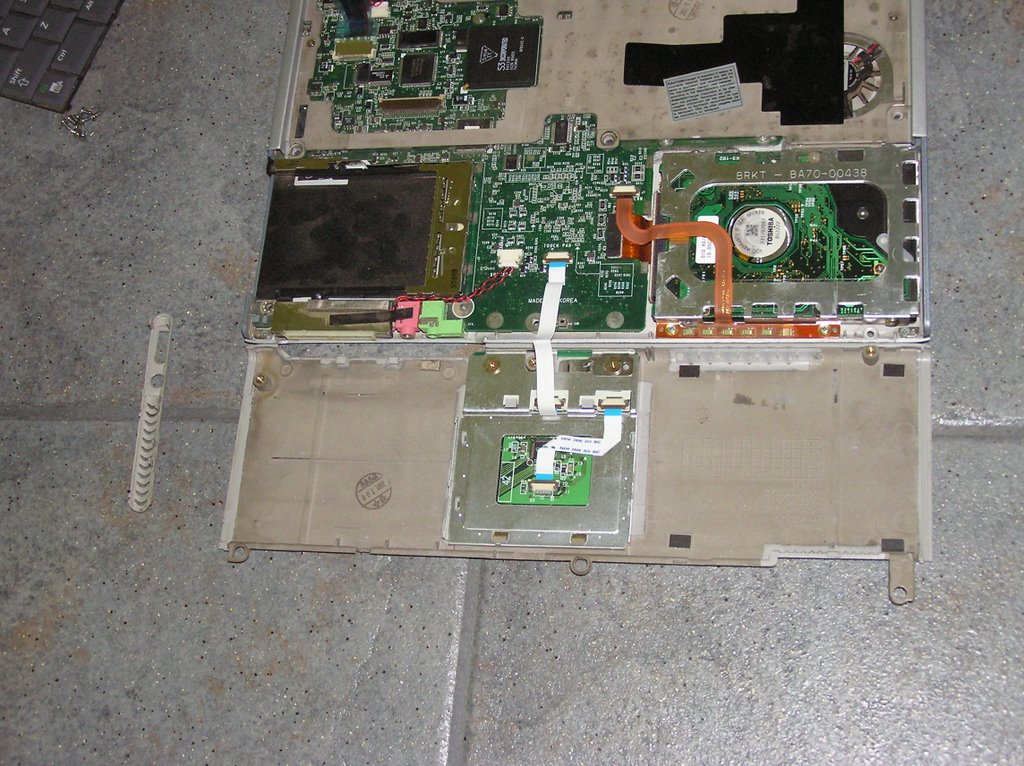
Pull out the four screws that hold the hard drive carriage in place, unhook the hard drive cable from the drive, change the drive, repeat directions in reverse.
A few random tips on working with laptops:
* A lot of people overtighten screws, make sure you're not one of those people before messing with laptops. They generally use cheap screws that strip out easily, and a lot of the time the screws aren't threaded into the sturdiest arrangements (often a brass boss molded into a plastic case) so those can be broken too.
* Use the right tools for the job - generally a #0 philips and some assorted small slotted drivers, a small allen set, small torx drivers, tweezers, needle nose pliers, a clean single edge razor blade, and of course a pocket knife are the tools that'll get you the most mileage. I find myself using a headlight a bunch too, but a regular desk lamp can do as well.
* I often set a piece of paper on the bench next to a laptop, write descriptions of where screws came from, draw a circle, and place the appropriate screws there to keep things straight. Often there will be several different styles of screws involved, so you need to keep track somehow.
* Use a good work surface - best thing is a workbench that's got plenty room to spread out parts, is higher than say a dinner table for good posture, and has good lighting. Next best bet is a good hard floor. Working on the floor is kindof nice sometimes, because if you happen to drop a screw it's not going to bounce off to places unknown if it's only falling from a couple inches.
* Keep some good electrical tape handy, things in laptops are often taped together, so you'll need to replace the tape you remove when putting things back together. New tape works better than sticking the same old tape where it came from.
* Keep wax paper handy for holding on to the little sticky screw covers and "warranty void if removed" stickers while you're tearing into things, then you can put them all back in the correct place later.
So, suppose that's all for the laptop stuff for now, maybe some NZ pictures coming later this evening?
posted by Slartibartfast @ 3:59 PM
![]()

1 Comments:
Found very cool and unique info here in this blog. This is a great addition in my favorite blog list.
Acer - Aspire 15.6" Touch-Screen Laptop - 4GB Memory - 500GB Hard Drive
Acer - Aspire V3 17.3" Laptop - 4GB Memory - 500GB Hard Drive - Nightfall Gray
Post a Comment
<< Home